Table of Contents
Understanding Popcorn Ceilings
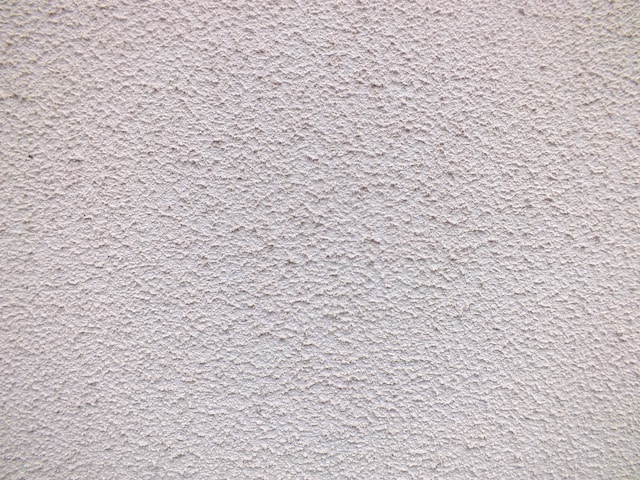
Commonly found in homes across North America, popcorn ceilings—also known as acoustic, stucco, or cottage cheese ceilings—have a unique, bumpy texture that resembles its namesake. This type of ceiling finish was notably popular from the 1950s to the 1980s, and it is renowned for its cost-effectiveness, ease of installation, and noise reduction properties. Made from a styrofoam or stucco mixture sprayed onto the ceiling, popcorn texture serves to camouflage construction imperfections and reduce echoing in room interiors. However, the coarse, uneven appearance may not be to everyone’s liking and, as home design trends evolve towards sleek and minimal aesthetics, many homeowners are seeking ways to make their popcorn ceilings smooth.
Despite their pragmatic advantages, popcorn ceilings have gradually fallen out of favor, not only due to changing design trends, but also because of real safety and maintenance concerns. The rough texture of these ceilings tends to collect dust, cobwebs, and other particles more readily than smooth ceilings, making them harder to clean and potentially triggering allergies. Moreover, some popcorn ceilings installed before the 1980s may contain asbestos, a toxic material that can pose severe health risks when airborne. As a result, the process of removing popcorn from the ceiling and rendering it smooth has become an increasingly popular home improvement task.
The History of Popcorn Ceilings
Popcorn ceilings, also known as acoustic ceilings, emerged as a prominent home decor trend during the mid-20th century. Starting from the 1950s through to the 1980s, these textured ceilings became the signature of American suburban homes. The name comes from the unique, bumpy texture these ceilings present, reminiscent of popcorn. Property builders found these functional and aesthetic, as they efficiently masked imperfections, provided sound absorption and were relatively low-cost to install.
However, the popularity of popcorn ceilings gradually began to decline from the late 1980s. This was due to the discovery of potential health risks associated with asbestos, a common ingredient used in their composition until the 1970s. The Environmental Protection Agency (EPA) implemented stringent regulations marking the gradual phasing out of asbestos in texturing materials. As homeowners became aware of these health issues and trends in interior design evolved, smooth ceilings became the preference, instigating the large-scale removal of popcorn ceilings in many homes across the United States.
Reasons for Removing Popcorn Ceilings

There are several compelling reasons to consider removing popcorn ceilings from your home or office space. The first and perhaps the most significant is the aesthetics factor. Popcorn ceilings, while once fashionable, are now viewed by many as outdated and undesirable, failing to match with contemporary interior designs. In fact, real estate professionals often report that homes bearing this type of ceiling finish often sell for less than those with smooth, modern ceilings. Removing the popcorn ceiling can thus be a smart move to enhance the visual appeal of your living space and potentially enhance the property’s value.
In addition, popcorn ceilings can present several pragmatic issues. They are notorious for being a magnet for dust and cobwebs, due to their bumpy, uneven surface. This can exacerbate allergies for those who are sensitive and make cleaning a challenging task. Moreover, if a home or building was constructed prior to 1977, there’s a possibility that the popcorn ceiling may contain asbestos – a harmful substance when airborne. In such instances, removing the popcorn ceiling becomes not just a matter of taste, but also of health and safety.
Potential Risks of Popcorn Ceilings
Though popcorn ceilings, once a popular trend in interior design, still hold some appeal for their acoustic properties and ability to hide imperfections, they can house potential hazards, particularly if installed prior to 1980. The primary cause for concern stems from the fact that many popcorn ceilings installed in the mid-to-late 20th century contained asbestos, a fibrous mineral used for its insulative properties and resistance to fire. However, asbestos fibers can become airborne during the removal process and, when inhaled, pose serious health risks, including lung disease and certain types of cancer.
Moreover, popcorn ceilings also attract and retain dust, allergens, and spiders, potentially influencing the quality of the indoor environment and posing a risk to those with allergies or respiratory issues. This is because the bumpy texture of the popcorn ceiling creates more surface area for dust and debris to accumulate, thus requiring more thorough and frequent cleaning. Also, popcorn ceilings could become a problem when it comes to selling a house as they are deemed unsightly and outdated by many potential buyers, which could influence resale value negatively. Hence, the potential risks supersede the aesthetic advantage of popcorn ceilings which further necessitates the need for their removal.
Preparation Before Beginning the Removal Process
Before embarking on the journey of giving your ceiling a new look, ensuring that you are well prepared is critical. A well-planned strategy can simplify the process, save precious time, and reduce the risks involved in removing popcorn ceilings. Initially, having a clear understanding of what lies beneath the textured surface aids in determining the appropriate techniques and safety measures. If the house was built before the 1980s, the popcorn ceiling might contain asbestos, which demands professional attention.
The next step is clearing the room entirely. Any furniture, electronics, or cherished items should be removed to prevent them from getting damaged by falling ceiling debris. Covering the room with plastic sheets can provide an extra layer of protection for large items that may be cumbersome to move. Ensure all your work areas are amply lit, given the intricate and detailed nature of the task at hand. Precise lighting will help you avoid missing any spots and give you a clearer view of the progress. Lastly, switch off any central heating or cooling systems to prevent the spread of dust throughout your home.
Gathering the Necessary Tools and Materials
Before starting the removal process, the appropriate tools and materials must be collected. This would enable you to accomplish the task more efficiently, reduce unnecessary pauses, and provide superior results. Essentially, having all the necessary tools and materials on hand ensures that you are prepared to handle any situation that might arise during the removal process. It is best to have protective gear, such as gloves, dust masks, and safety goggles, a garden sprayer for wetting the ceiling, a wide putty knife for scraping, and large plastic sheets for catching falling debris.
To make the popcorn ceiling smooth after removal, a number of different products could be useful. A flexible sanding block, for instance, can help create a silky, uniform surface. Additionally, drywall compound is also crucial to fill in any minor dips or blemishes that could occur during the popcorn ceiling removal process. A long-handled roller or sprayer might also be needed for applying primer and colour to finish and seal the ceiling once the popcorn has been removed. This will ensure you achieve a professional-looking outcome.
Here is a detailed list of the tools and materials you might need during the removal process:
• Protective gear: This includes gloves, dust masks, and safety goggles. These are necessary to protect yourself from potential harm while working.
• Garden sprayer: A garden sprayer can be used for wetting the ceiling before starting the removal process. This helps in loosening up the popcorn texture making it easier to scrape off.
• Wide putty knife: You will require this tool for scraping off the wet popcorn texture from your ceiling.
• Large plastic sheets: These should be spread on your floor or furniture to catch falling debris during the scraping process. It makes cleaning up afterwards much easier.
For smoothing out your ceiling after removing its popcorn texture, consider using these products:
• Flexible sanding block: After scraping off all of your popcorn ceiling, a flexible sanding block can help create an even surface by getting rid of any remaining rough spots or uneven areas.
• Drywall compound: Use drywall compound to fill in any minor dips or blemishes that may occur during removal. Once dried, it provides a smooth surface ready for painting or priming.
Lastly, here are some additional tools you might find useful:
• Long-handled roller/sprayer: For applying primer and colour once you’ve smoothed out your ceiling. Using one ensures paint gets applied evenly across large surfaces like ceilings without leaving streaks or patches.
By gathering all these materials beforehand, not only do you ensure efficiency but also superior results with minimal interruptions throughout the entire project.
Safety Precautions Before Starting
Before embarking on the process of removing the popcorn ceiling, it’s important to place the safety of all involved above everything else. One must understand that even while being a straightforward procedure, it consists of risks that can lead to injury if not handled correctly. There may be debris and dust that could negatively impact one’s health if the right safety measures are not enacted.
Secondary precautions should involve the use of professional-grade protection equipment such as safety goggles, gloves, and respirators, which help to safeguard the skin, eyes, and respiratory system from any harm. It is advisable to wear disposable coveralls or old clothing to avoid skin contact with the ceiling material. For an extended ceiling or a multi-story work area, a stable ladder or scaffolding is crucial. Doorways and vents should be sealed off to prevent the spread of dust particles into the other parts of the premises. These safety measures, if adopted, would ensure a smooth process providing a cautionary work environment.
Step-by-Step Procedure for Popcorn Ceiling Removal
The endeavour of popcorn ceiling removal involves a meticulous series of tasks where utmost caution is necessary to prevent damage to the ceiling structure. Initially, the entire room should be emptied of furniture and all light fixtures or ceiling fans removed. The ceiling surface should then be lightly sprayed with water to soften the texture, taking care not to soak through and damage the drywall underneath. After the water has absorbed for about 15 minutes, a putty knife can be used to gently scrape off the popcorn surface. Remember, the goal is not to gouge out the ceiling but to skim off the textured surface.
A professional approach to this project involves using a garden sprayer to mist the area first. By dividing the ceiling into smaller, more manageable sections, you are ensuring a smoother and more efficient removal process. It’s also crucial to keep a steady pressure while scraping. Too much force can cause damage, while too little will leave the popcorn texture. An angled approach with the knife can be beneficial for lifting the texture off without digging into the drywall. Consistent clean-up during the scraping process helps in maintaining space quality, preventing the accumulation of removed material underfoot. The process is iterative: mist, scrape, clean, and repeat until every area of the ceiling is smooth.
Maintaining Cleanliness During the Process
Maintaining a clean environment during the process of popcorn ceiling removal is absolutely crucial, not only for safety reasons but also to ensure efficient operation. It helps to prevent any unnecessary stumbling blocks that could slow down progress and extend the duration of the project. By incorporating diligent cleaning protocols at regular intervals and following a methodical process of sectioning off areas of focus, work can be done in a controlled and orderly manner.
Utilizing sheeting and tarps correctly can help contain the debris and dust that is inevitably created during popcorn ceiling removal. This will make the cleaning process far easier and more manageable. It is also highly advisable to empty the rooms beforehand, removing any furniture or other items. This facilitates the cleaning and ensures the successful removal of popcorn from the ceiling so that it can be made smooth, without any unwanted interruptions or distractions. Periodic vacuuming of the area can also effectively manage the dust and debris accumulation.
Tips to Make the Job Easier
Undertaking a popcorn ceiling removal can be a challenging endeavor that calls for strategic planning and careful execution. One valuable tip to facilitate the process is to pre-wet the popcorn ceiling with a water and vinegar solution. This can be achieved by using a garden sprayer and saturating a small, manageable area of the ceiling at a time. The moistened popcorn ceiling texture would then be easier to scrape off, resulting in a smoother and less damage-prone removal process.
Integrating appropriate tools can also boost the efficiency and effectiveness of the removal task. For instance, utilizing a popcorn scraper attached to a bag can simplify the collection of scrapings and significantly curtail the subsequent cleanup required. Similarly, a pole sander can be instrumental for achieving a smooth and even finish once the popcorn ceiling has been removed. Employing these tips can indeed make the job of popcorn ceiling removal less cumbersome and more manageable.
Repairing and Refinishing the Ceiling Post Removal
Once the popcorn texture has been meticulously removed from your ceiling, repairing and refinishing become the next essential steps to ensure a smooth, polished surface. Over the years, the popcorn material might have hidden subtle damages or imperfections across the ceiling surface. Now with the popcorn layer removed, these flaws are likely to be exposed. These could range from small holes or cracks to uneven drywall seams. Repairing the ceiling includes addressing these issues, by filling in the gaps, smoothing rough areas, and leveling uneven spaces using appropriate tools and materials.
The process of refinishing a ceiling post popcorn removal can significantly enhance the aesthetics of your space. Applying a fresh coat of prime and paint not only results in a visually appealing, smooth finish but it also provides an additional layer of protection to the ceiling surface. The selection of the right type of paint and primer is integral to getting the desired effect. Moreover, the application techniques play a crucial role as well. Spraying is often preferred over rolling as it provides a more uniform distribution and a smoother finish. With a professionally refinished ceiling, your room gets an instant makeover, making the entire popcorn removal process worthwhile.
Professional Assistance for Popcorn Ceiling Removal
Engaging professional services for removing popcorn ceilings can be an appealing solution, particularly when seeking the assurance of having expertise and experience on your side. These professionals come ready equipped with the necessary tools and knowledge to efficiently remove the textured material and minimize exposure to potential hazards. Various firms offer this service, providing comprehensive solutions that encompass pre-removal preparation, debris cleaning, and even ceiling refurbishment post-removal.
However, when hiring a professional, it’s crucial to verify their credentials and credibility in handling such specialized tasks. Take the initiative to conduct adequate research, inquire about their prior experiences, and request customer referrals if possible. Ensure that your chosen professional is adhering to safety standards and is capable of mitigating risks linked to asbestos exposure. Be clear on service fees and check whether they are inclusive of after-service clean-up and repairs. Expect a smooth, hassle-free popcorn ceiling removal when you entrust the task to the right professionals.
Post-Removal Ceiling Decoration Ideas
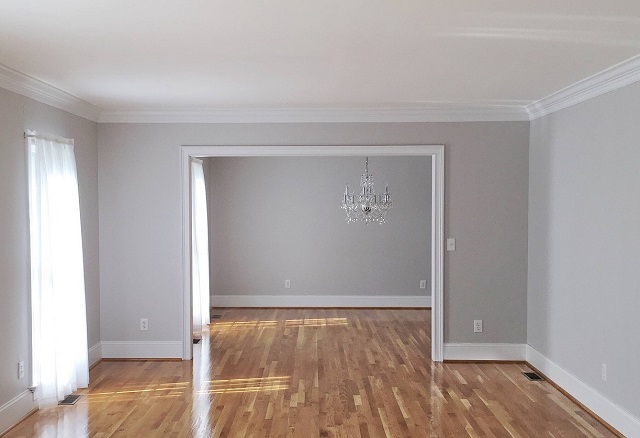
After the strenuous process of popcorn ceiling removal, homeowners have an open canvas on which to reimagine their spaces. The first choice for many often is to opt for a smooth, freshly painted ceiling. This option allows for limitless color selection and will provide your room with a modern, sleek look. Even more so, a smooth ceiling bounces off more light, creating a brighter and often seemingly more spacious room, a must for those seeking to optically expand their spaces.
In contrast, if you desire to maintain some texture for aesthetic purposes or to mask minor defects, you may consider options like a knockdown, skip trowel, or swirl texture. These finishes add a subtle visual interest without being as dated or overwhelming as popcorn ceilings. Additionally, installing ceiling tiles or planks can dramatically change your room’s look, adding an elegant touch or a warm, rustic appeal. Remember, the end goal is to create a ceiling that complements your overall interior design and personal style.


